‘Twistwork’ is the way that traditional woodturners refer to spiral work – primarily a kind of carving – on spindles and bannisters. This embellishment was considered the most skilled work in any turning shop, according to the late Alan Batty. The reason being it was the last process before the end of the turning and usually fetched 3x the cost. Well into the 20th century, it was done with a ‘twisting gouge,’ using the lathe to hold the spindle as the turner carved the spirals.
I made examples of the many styles of twists that Alan described to me. He had collected photos from another English shop – Allan Beacham’s – to get me started. Alan Batty designed the ‘regency’ style of these samples, with the urn at the bottom, and coves at the top and bottom of the twisted section. Each finished sample is matched with a grid layout for cutting the twist.
When I studied twistwork with Stuart Mortimer in his shop, he introduced me to cutting the twists with tile files and wood rasps, as well as microplanes, tiny hand planes, carving burrs, and Arbotech cutters. The most important tool was fabric-backed sandpaper that could be torn into thin strips and made into sanding ropes for finishing the surfaces. Stuart is the virtuoso of twistwork, which has gone on to all types of hollow forms, finials, and open twists. He started in the traditional style with grids, but his vast experience allows him to cut freely into vessels of many sizes and shapes. The most important feature is that the grid that is formed is a function of diameter of the piece.
Many of Mortimer’s innovations have greatly speeded up the making of twistwork. As woodturners are increasingly fascinated by embellishment, they will inevitably rediscover this style of carving. When they do, these posts are here to lead them beyond that old familiar barley twist. With all of the tools that are out there if you find one that works for you, then buy up the quantity that you think you will use.

Photo: Rope Twist
Twists are described by the number of ‘starts’ at the base. Rope twists generally have 8 starts. gable twists are made with 9 starts. The steps on the grid are roughly square, so that the twist comes back to the starting face of the work after 8 or 9 steps.
This twist is the one that can be made with a Sorby texturing tool.
It can add interest to pens, fancy spindles like wands, or furniture legs.
The grid I use is an important tool in itself for wrapping any design feature around a 3-dimensional form.
The groove can be cut with a small saw, rasp, or file. The beads must be rounded over by hand with files and flexible abrasives. Twistwork requires starting with 80 grit for the rough shaping, and sandpaper is a shaping tool.
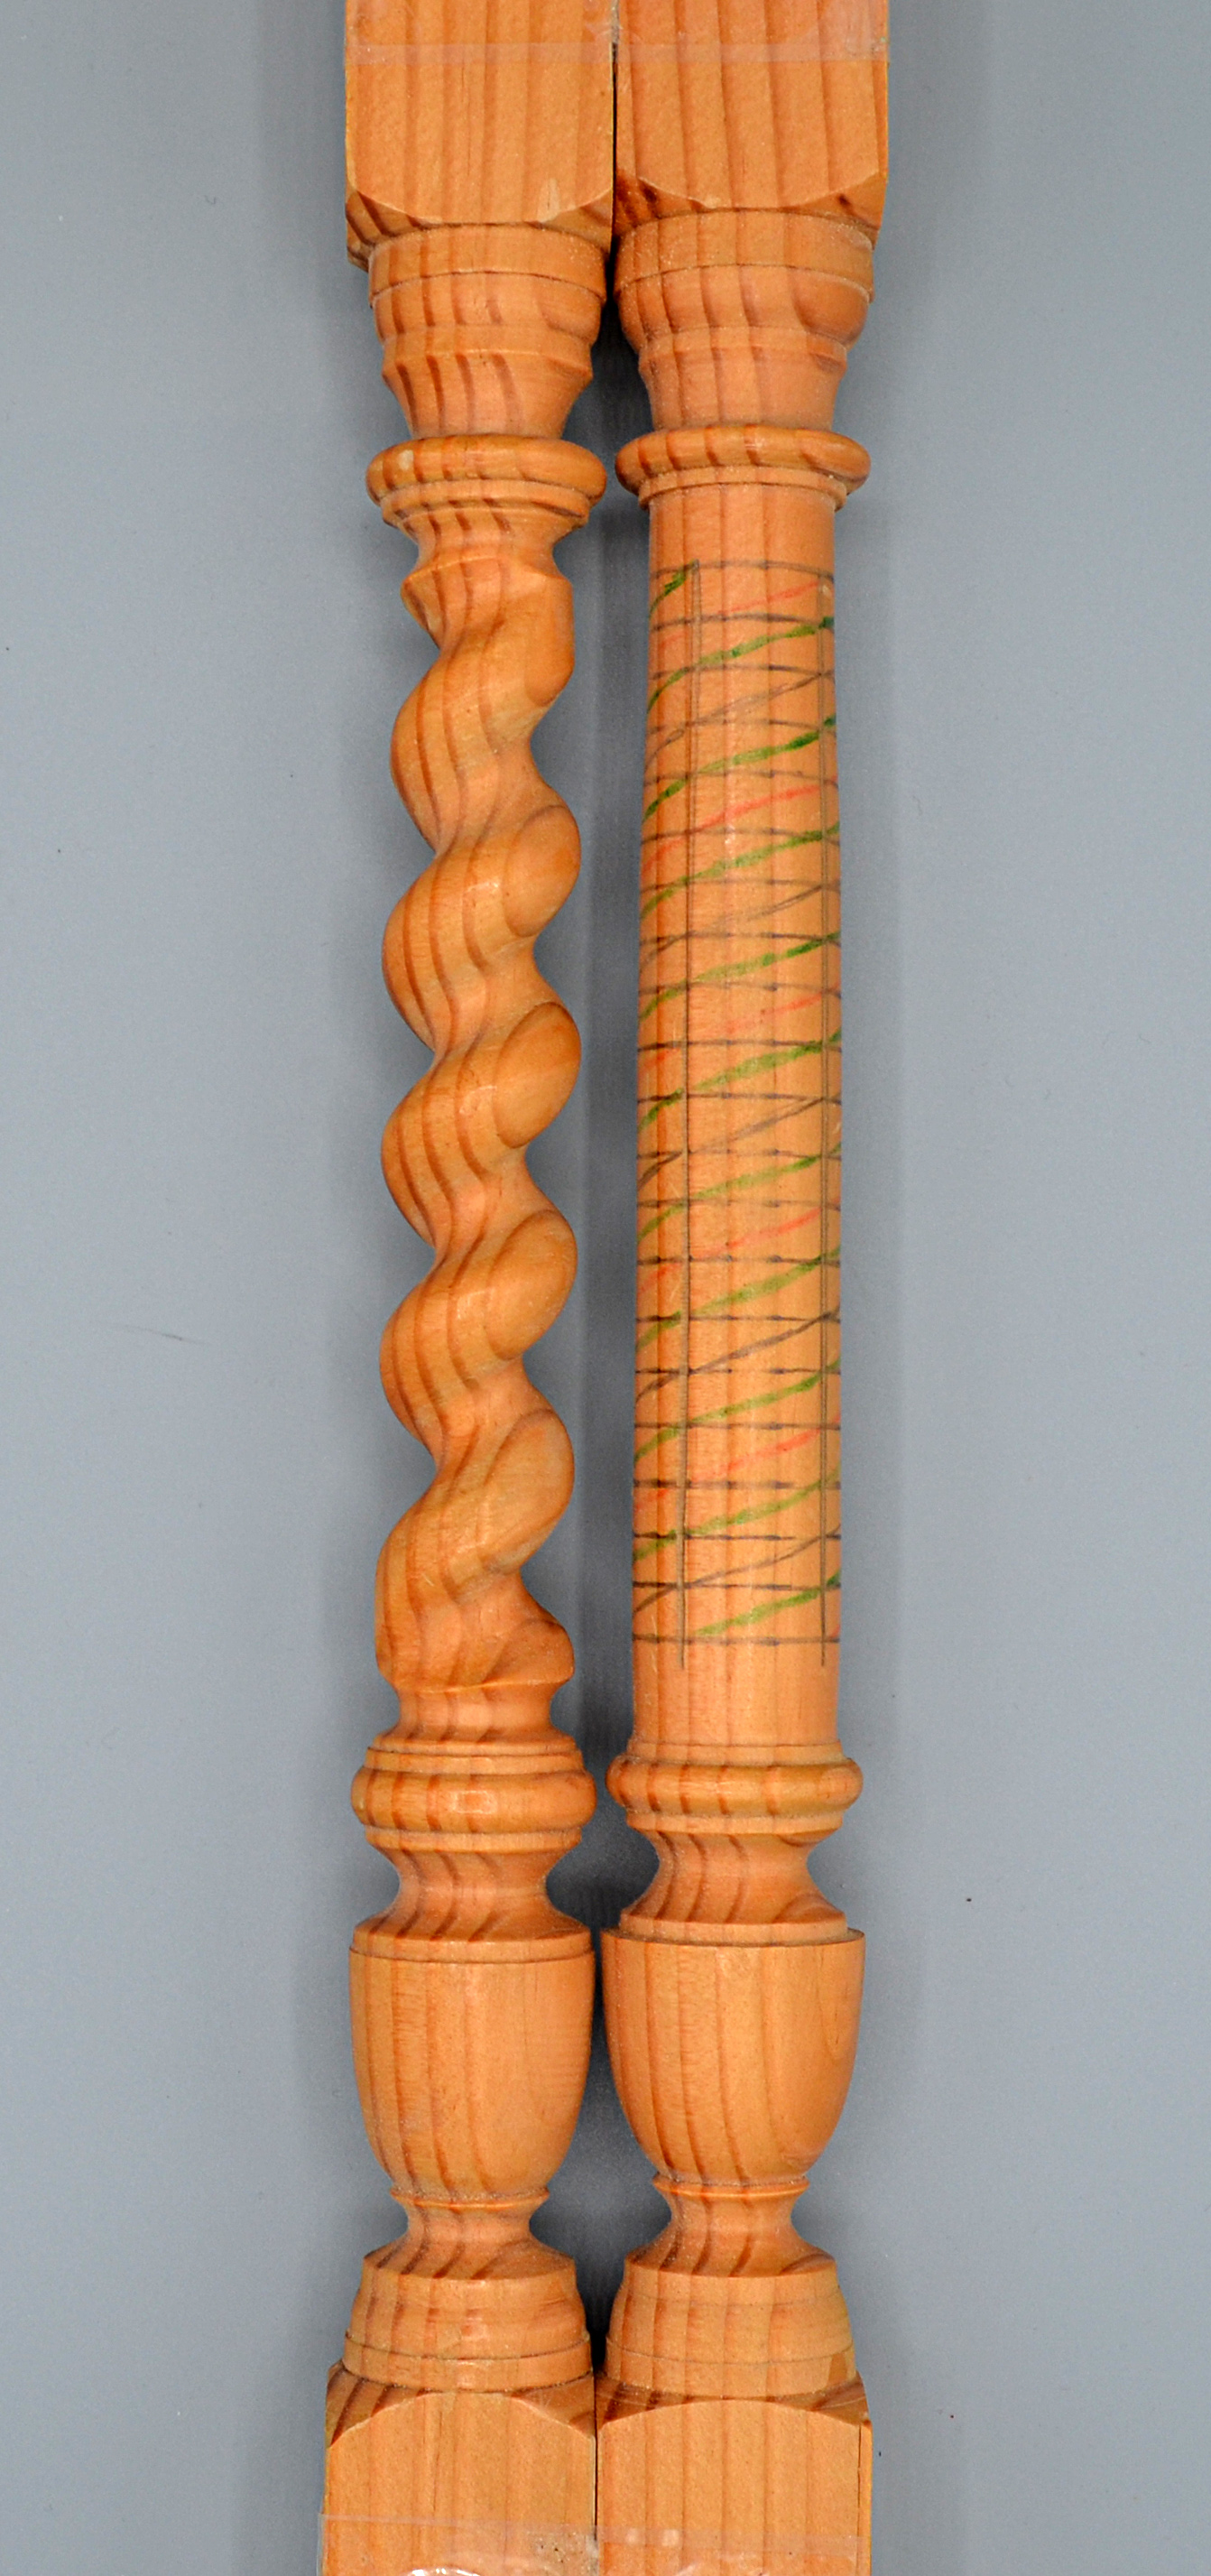
Photo 2: Single Twist
A remarkable number of lines on the grid for this simple twist! The green pencil lines are the top of the beads, and the red lines are for the bottom of the cove. The beads and coves are roughly the same volume in the finished work.
A single twist cuts very deep into the spindle, weakening it significantly. This is the broken piece that finds its way into turning shops for a replacement!
You can see that the bead makes its way around the spindle with a complete revolution.
Twists have a left-right orientation, based upon the direction in which the twist rises. This one is a right hand twist. Pairs of turnings, like candlesticks, may have a left and a right.
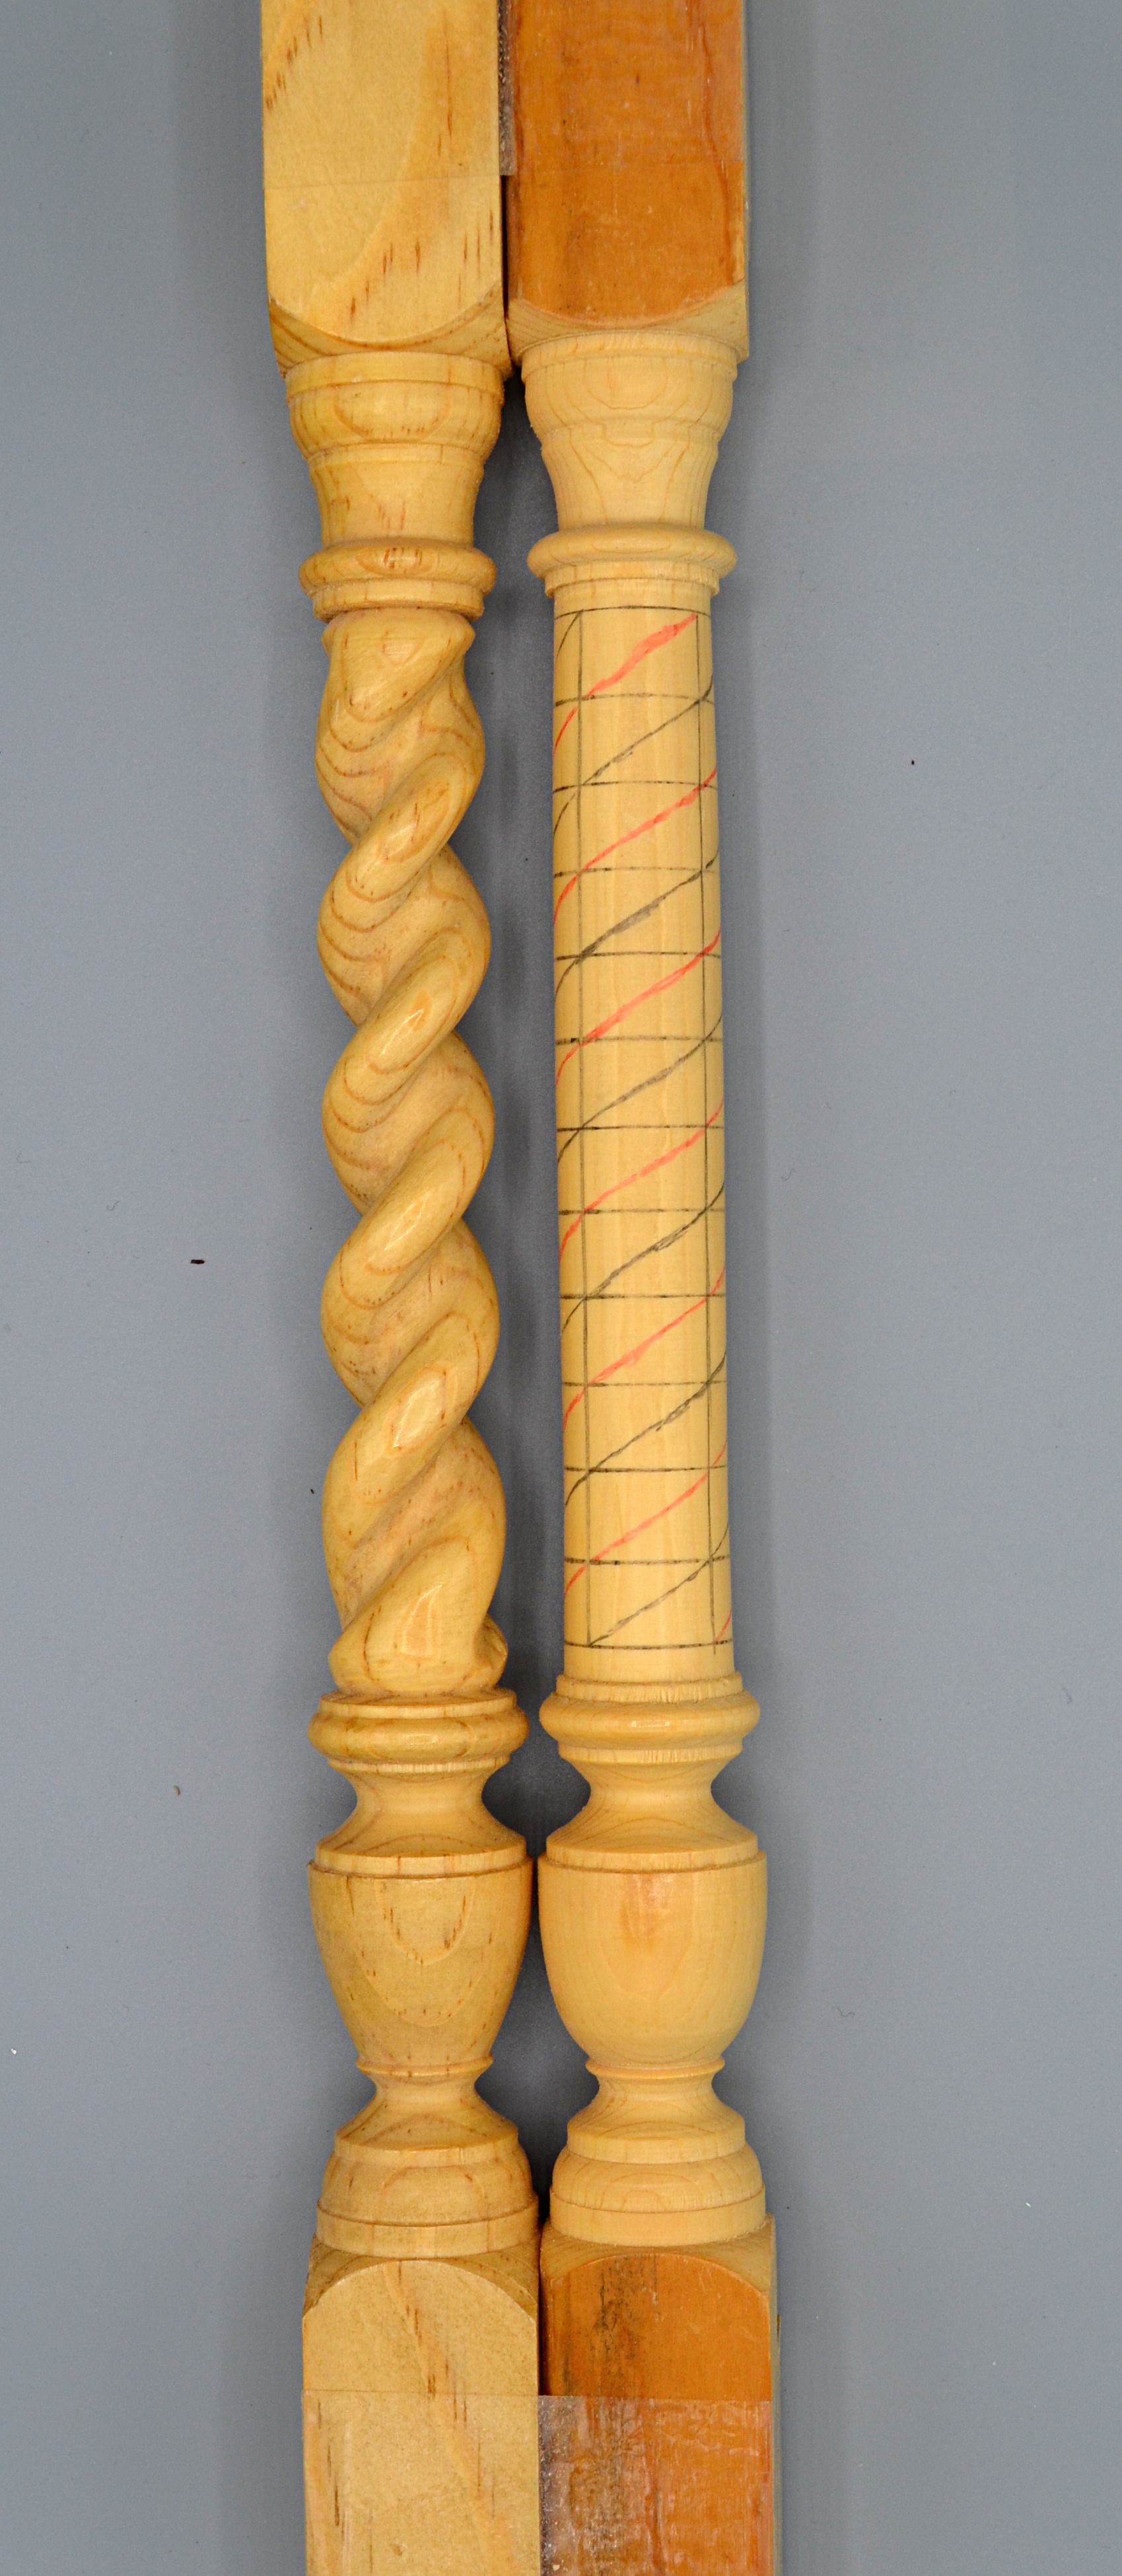
Photo: Double ‘Jacobean’ twist, (commonly called the barley twist)
Stuart Mortimer says that the rounded cove makes it a Jacobean Double; a Victorian Double would have a pointy coves.
Double = 2 starts at the base so that the beads (called ‘bines) alternate on the climb to the top. Twisting a double results in going around the piece. Here are the common measurements.
1. Single Twist 1 bine that goes around the piece in 1 diameter 2. Double twist 2 bines that go around the piece in 1 diameters 3. Triple twists 3 bines that go around the piece in 3 diameters 4. 4 start twist 4 bines that go around the piece in 4 diameters 5. 5 starts and above go around the piece in 4 diameters
Hand-cuttings twists also allows for the twists to wrap a bulging or graduated spindle. The planning process starts with the design of the grid – shorter steps for thinner diameters, and taller steps for wider ones. I haven’t shown that flexibility with these samples, but it is one of the beautiful ways that handwork accommodates special features.
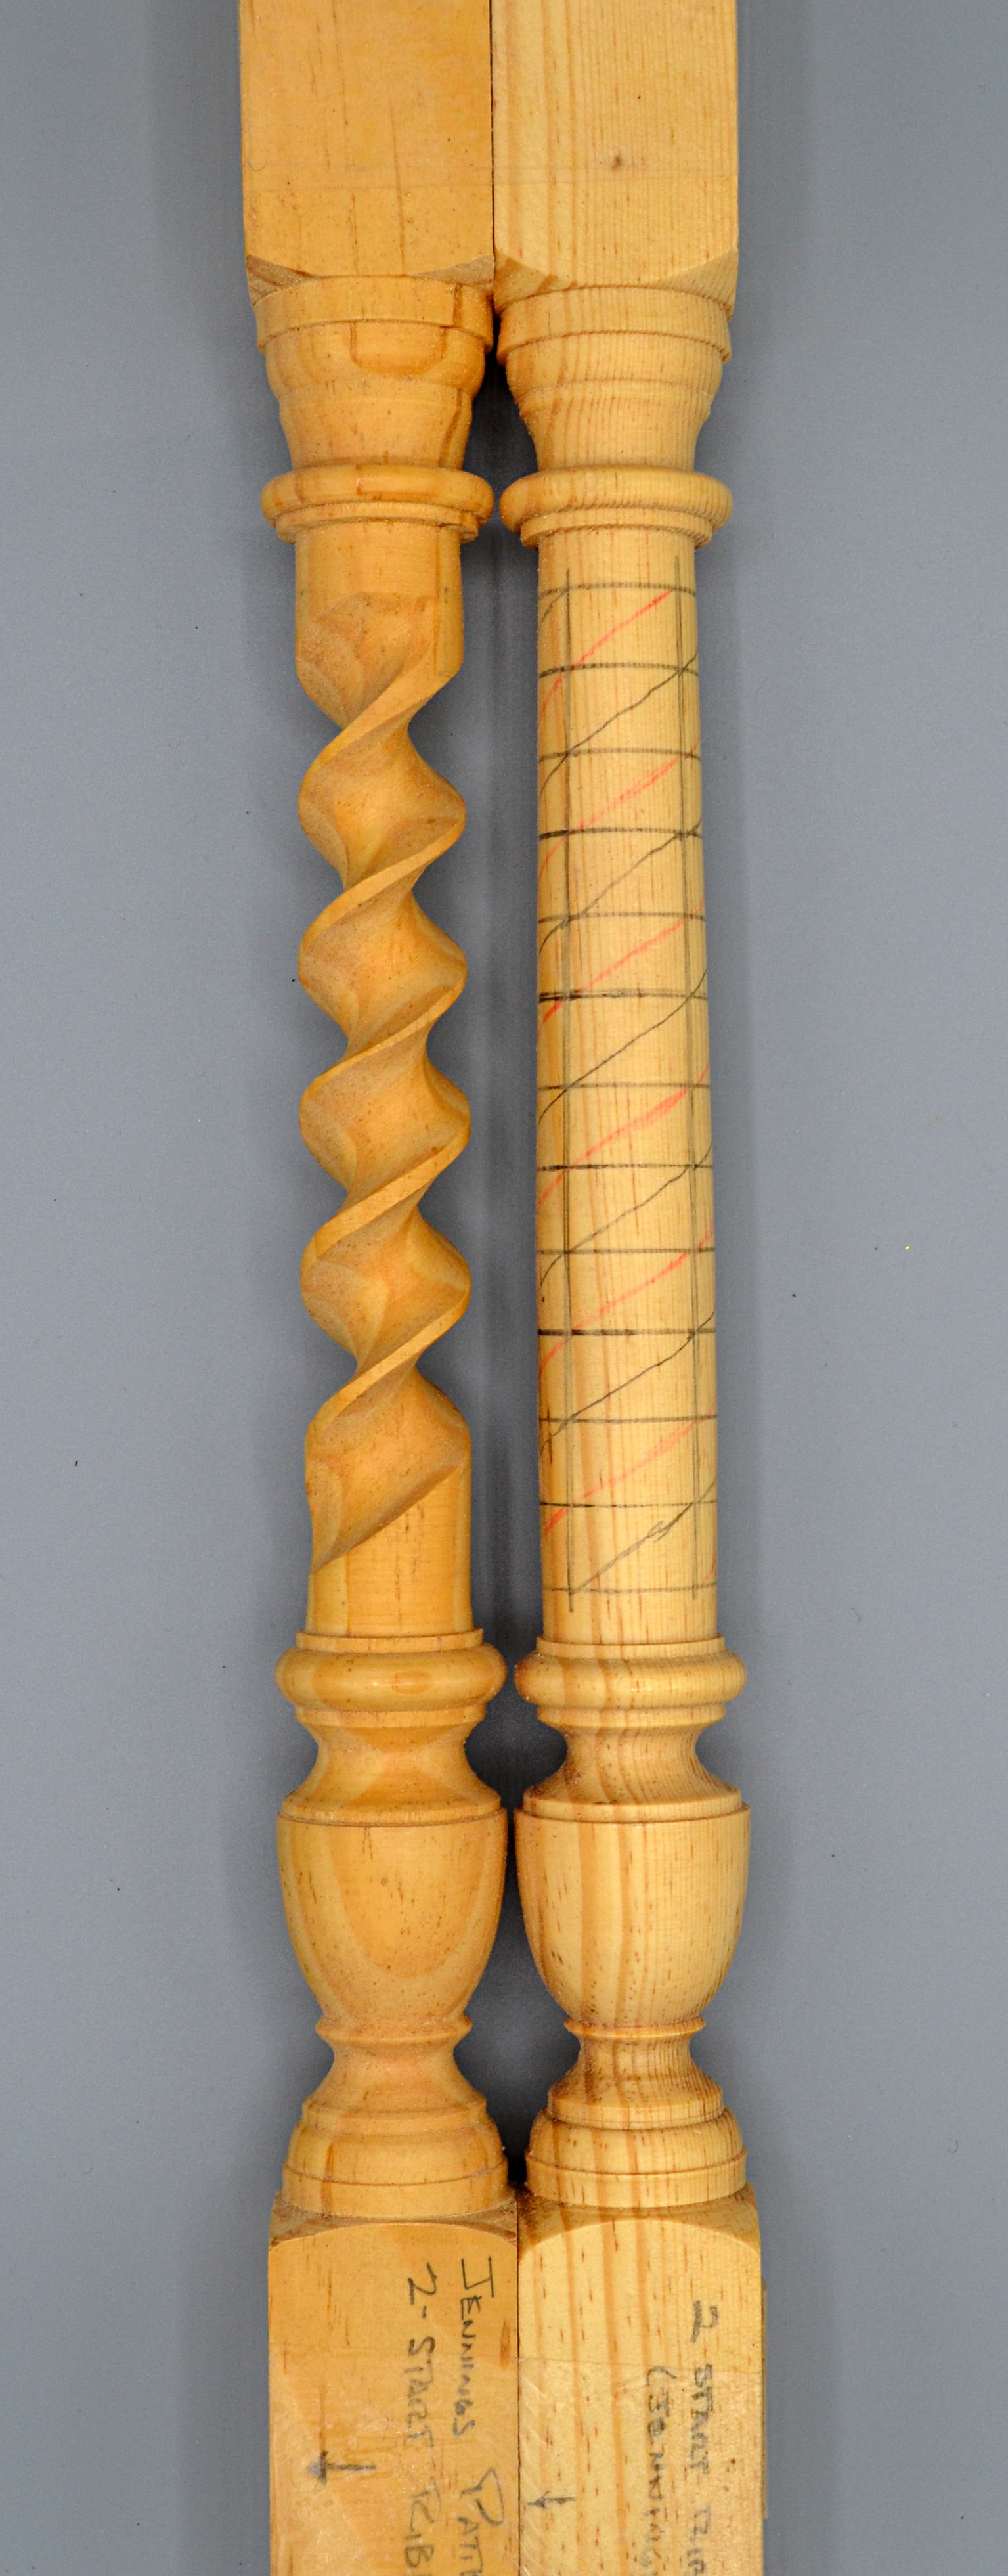
Photo: 2-start Ribbon Twist (Jenning pattern)
It becomes a ribbon when the coves widen and the beads are small. The beads can be pointy or have a very small rounding. This is a very weak twist.
Ribbons are easier to cut than the barley-twist styles, as long as you take tremendous care to reserve the small area for the bead! I find that marking the beads very carefully and then reserving that surface is the key to survival.
Notice that the depth of cut is greater on this one than on the 3-start ribbon below.
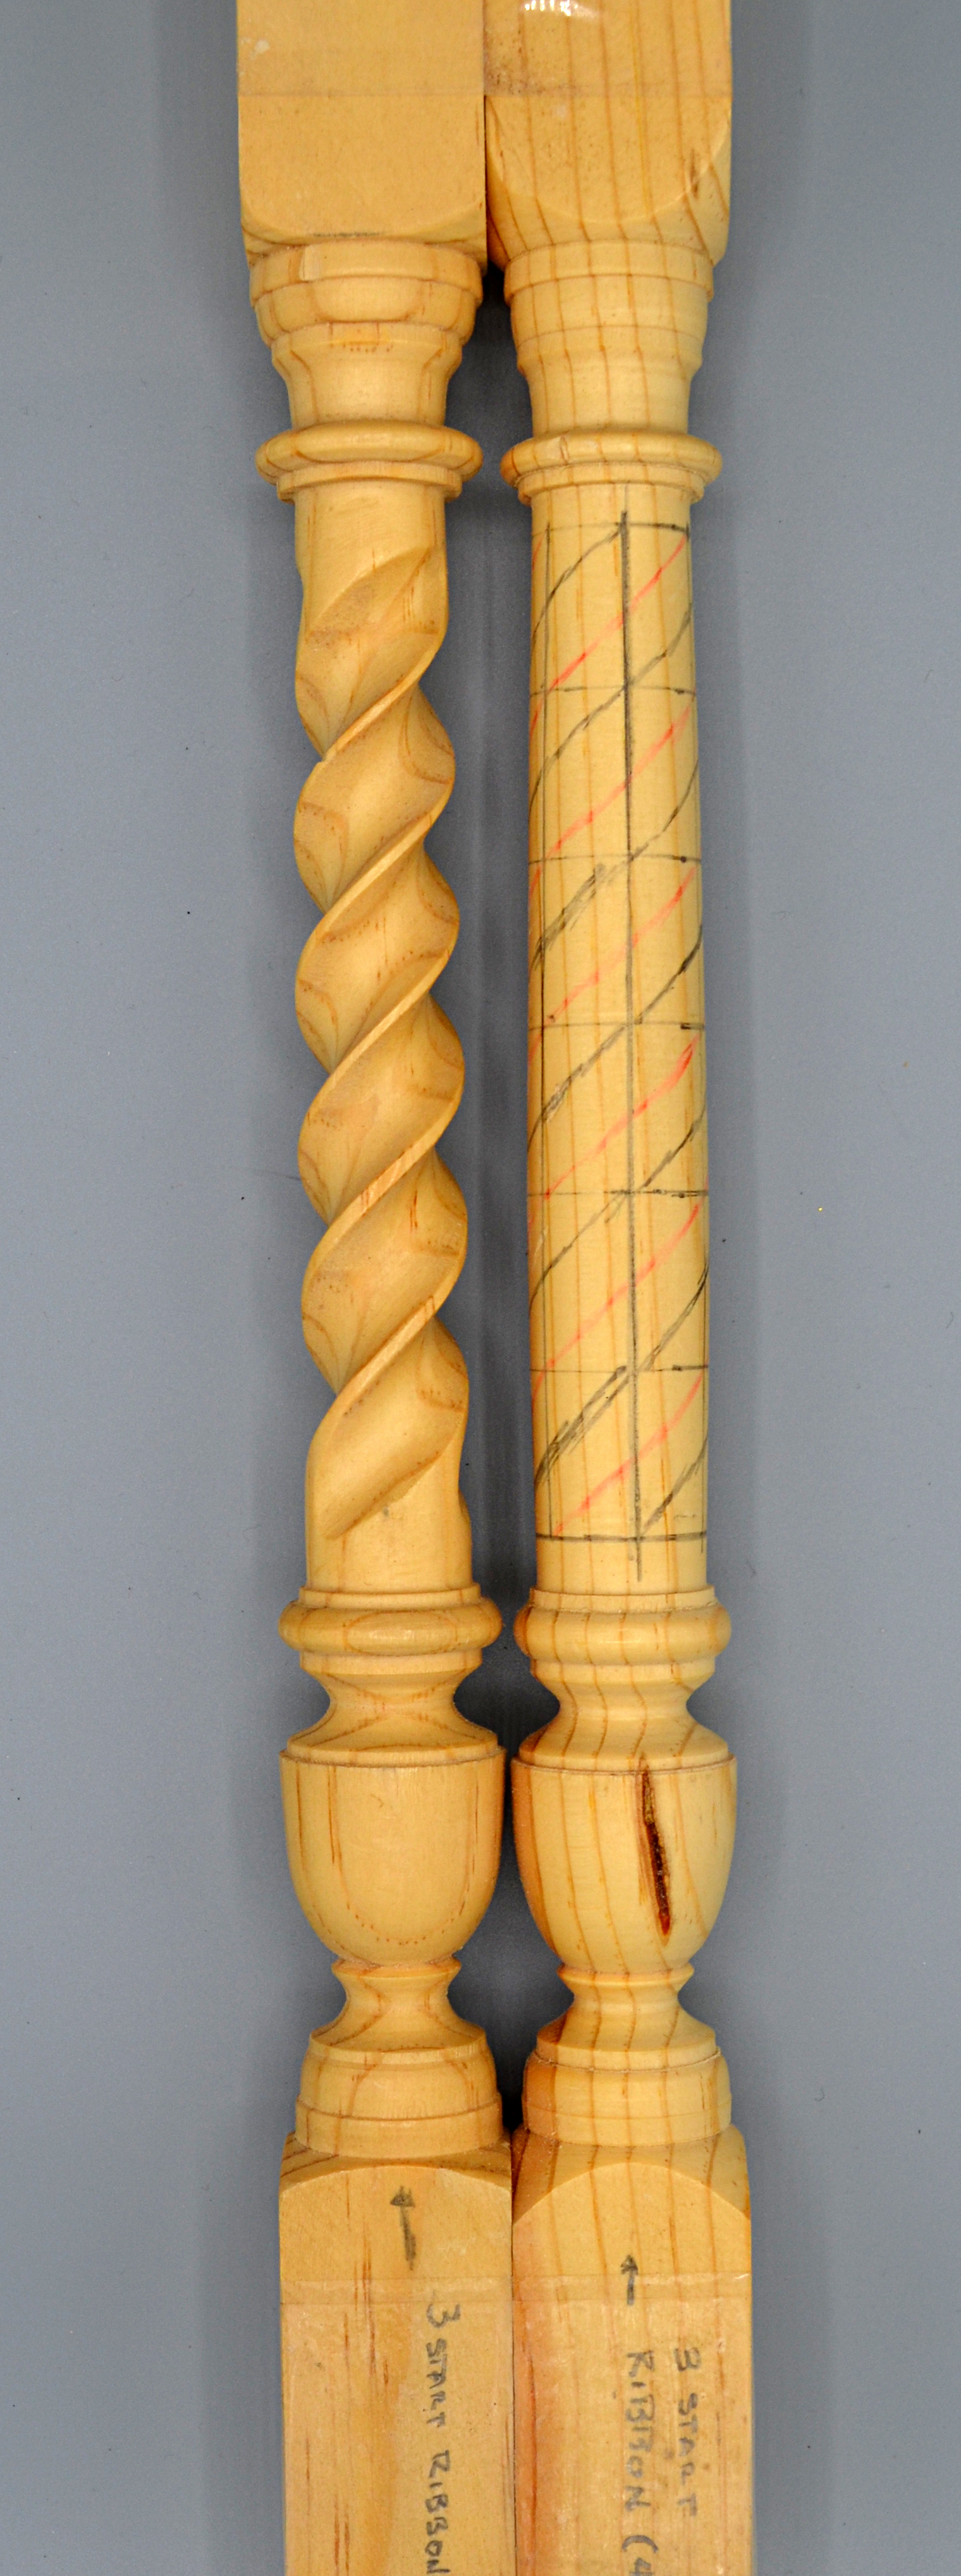
Photo: 3-start Ribbon Twist
The microplanes are a tremendous help cutting ribbon twists, if you can find one with a curve close to one you want for these coves.
Did I forget to mention that the twistwork is done with the lathe NOT running?
This is serious work carving, for which the lathe is the holding device. It is pleasant work, however, as you learn to rotate the piece by hand. You can make a continuous cut from the base to the top of each cove when you get the coordination going!
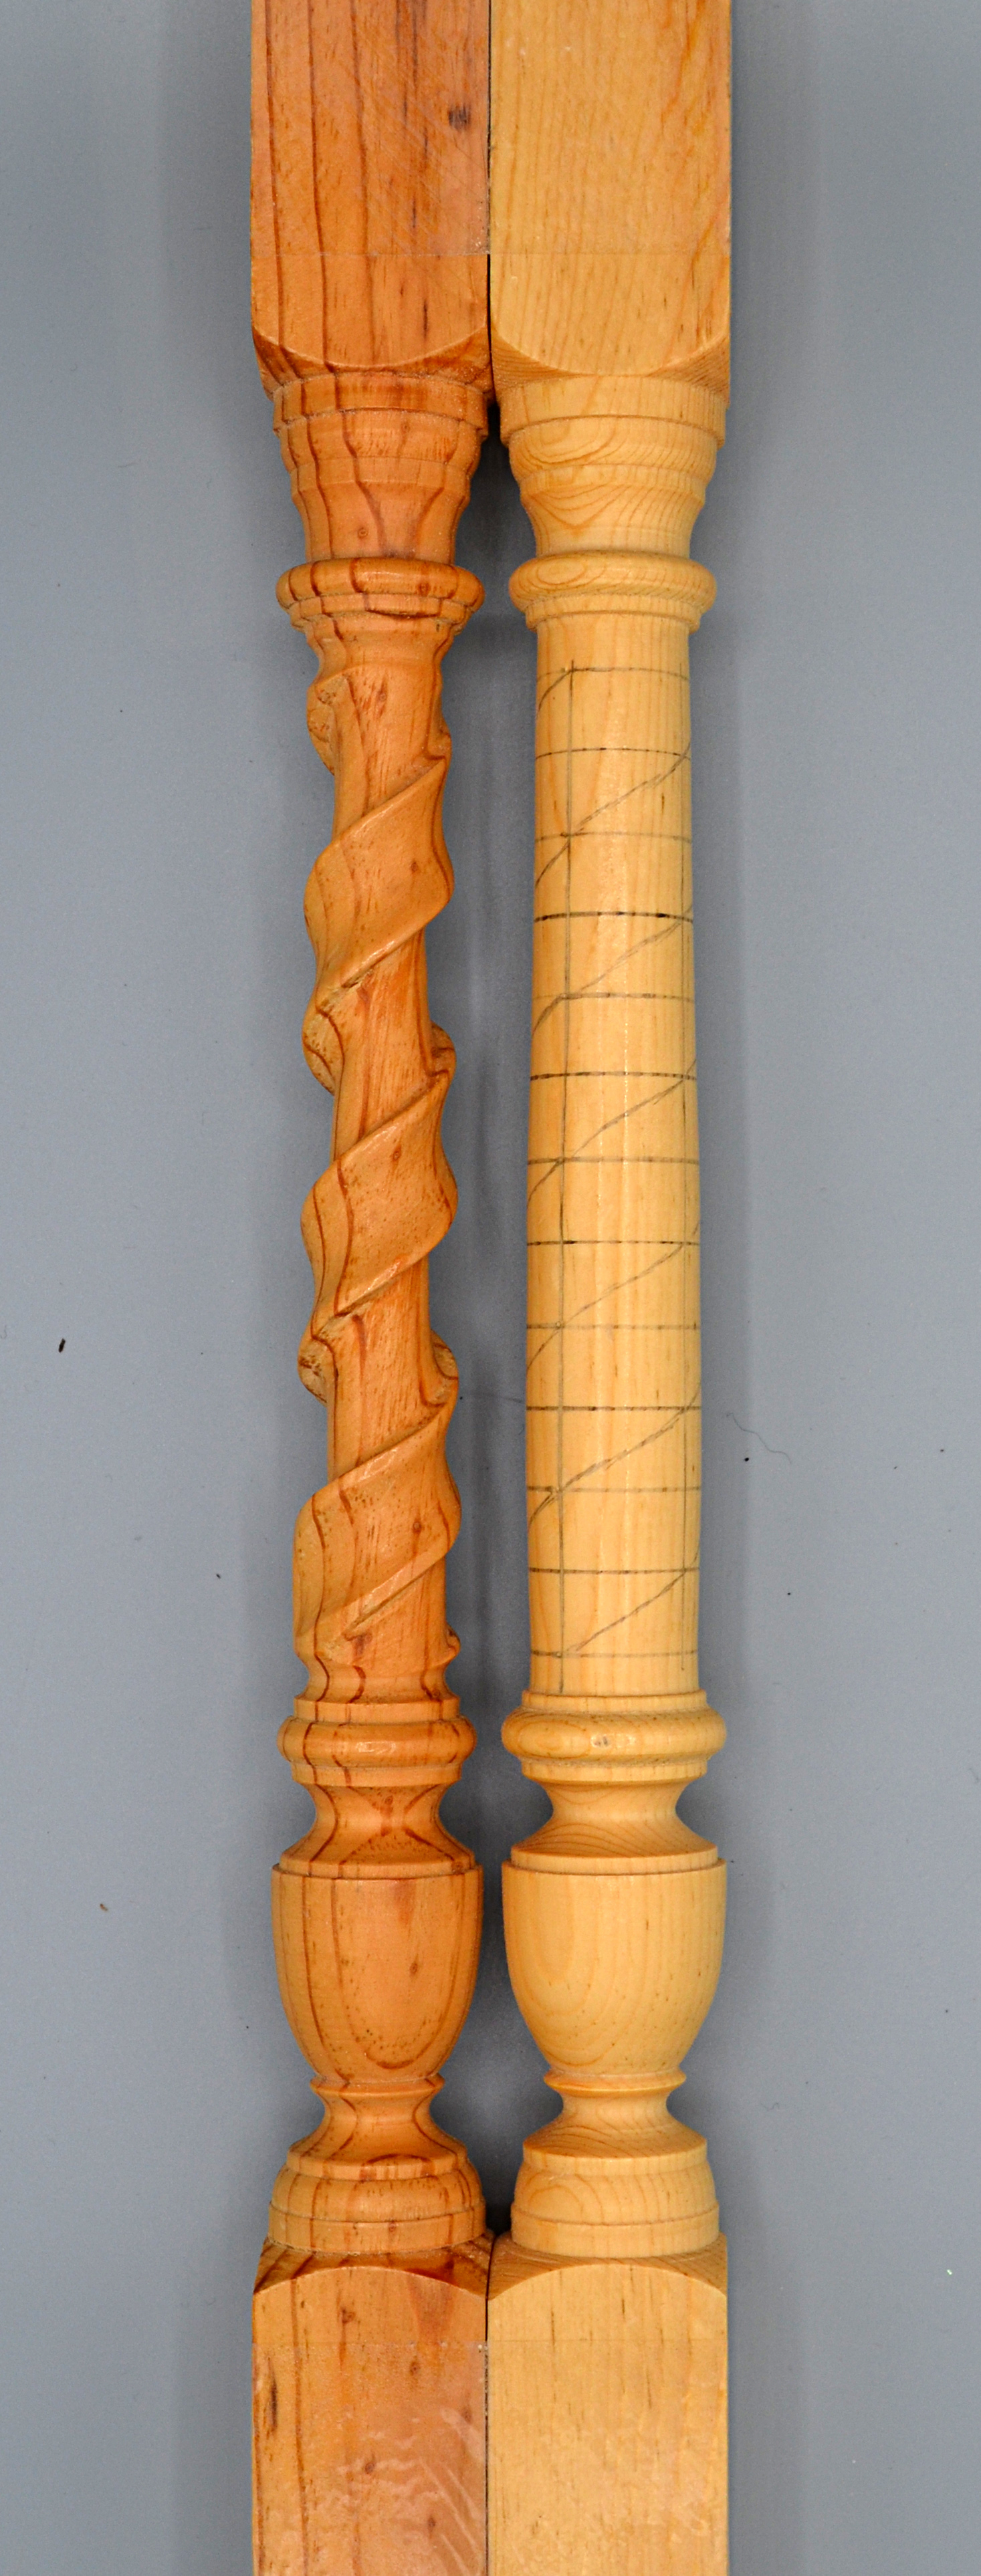
Photo: Banner Twist
One of my favorites!
This is another simple layout that requires some focus!
It is a 2-start ribbon twist, but one ribbon ‘s cove is cut deeper than the other one to create the banner.
Twistwork is a lovely way to create embellishment without covering up the wood. It is about embellishing the form, not just the surface.
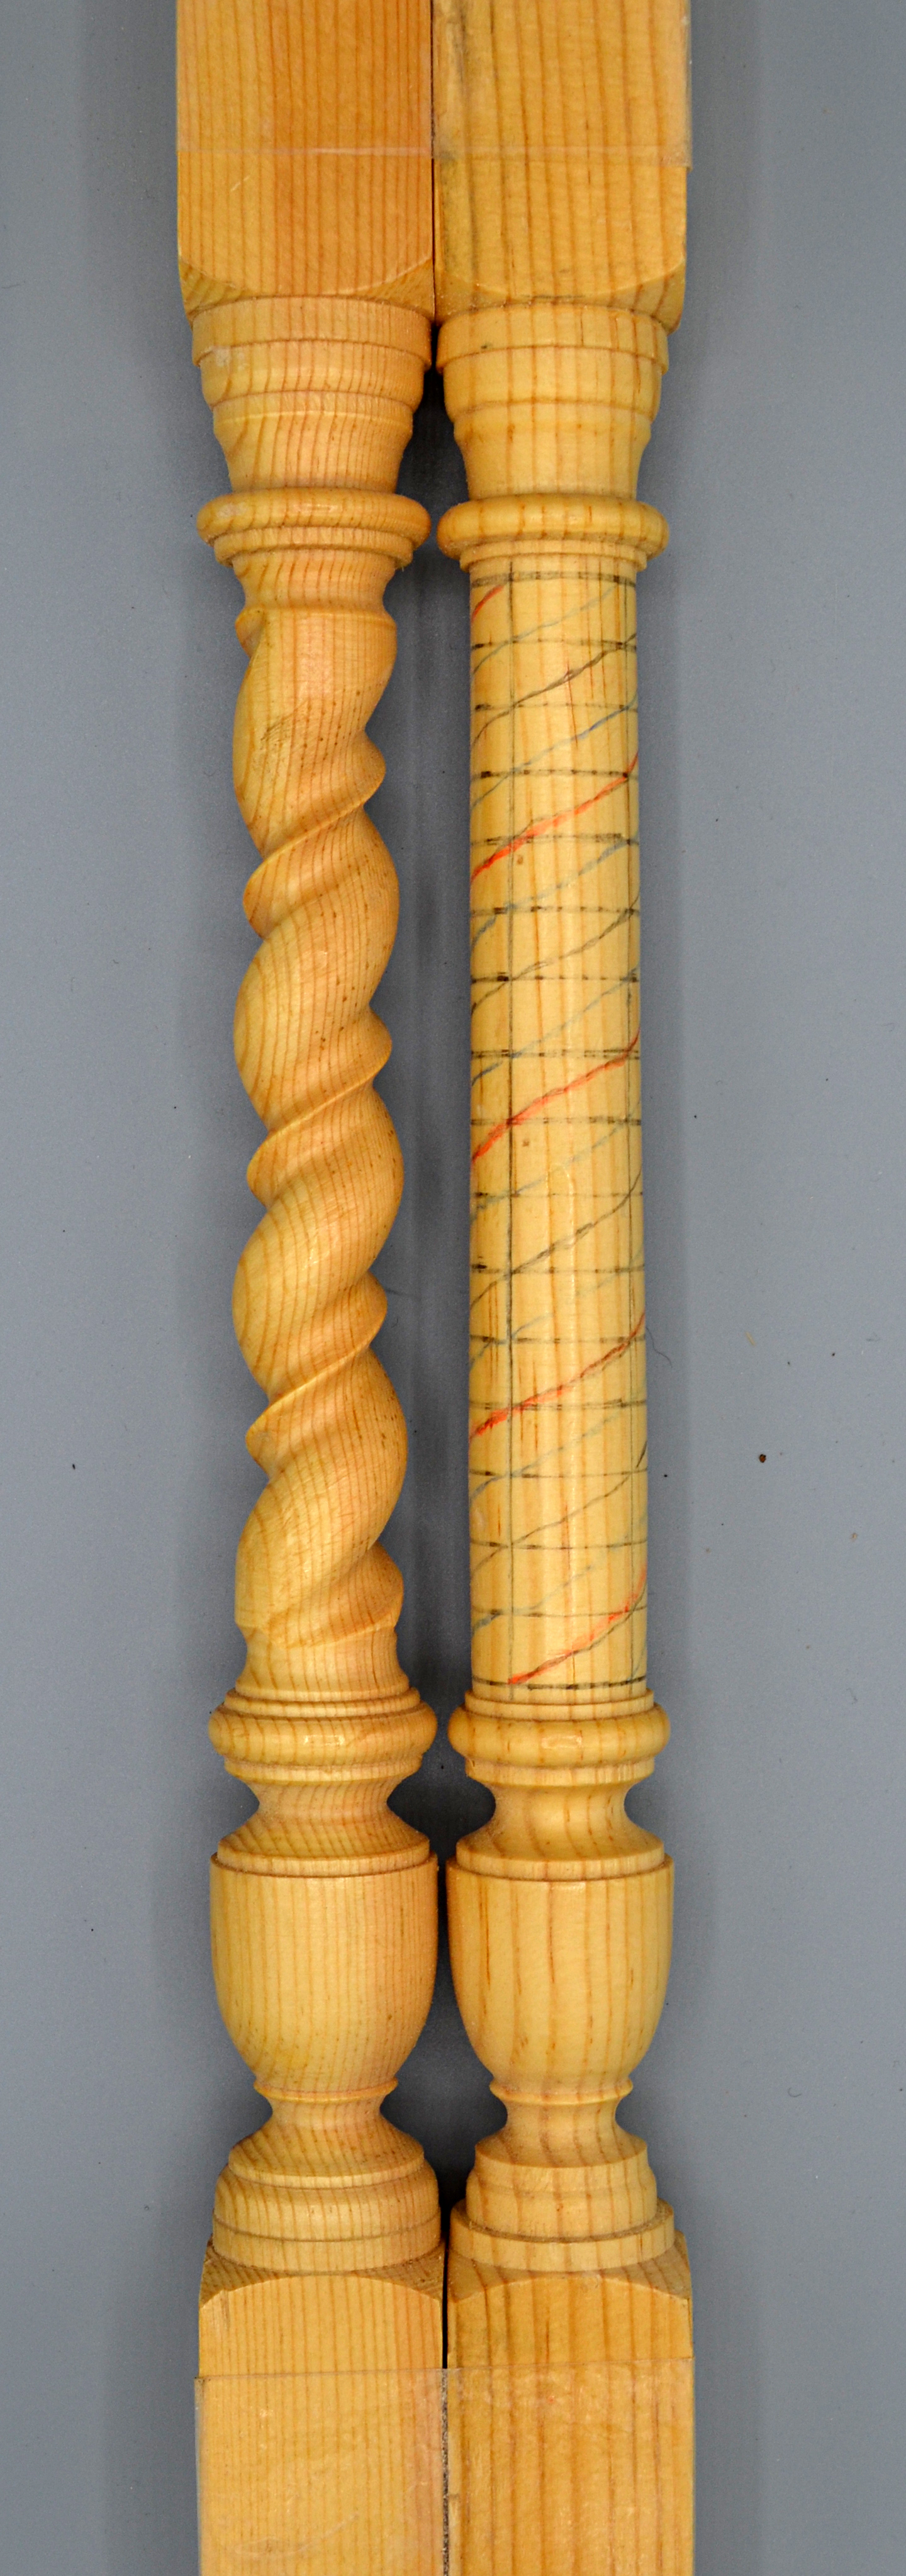
Photo: Single Point twist
Quite the most magical twist of the set!
The layout for this twist makes color pencils a necessity. The grid is modified because of the different in the size of the single point. The length of the layout is 1.5x the diameter. One start is a typical bead, but the second start is a narrow point with two coves. On my grid, the fat beads are red, and the points are black.
But wait — there’s more!
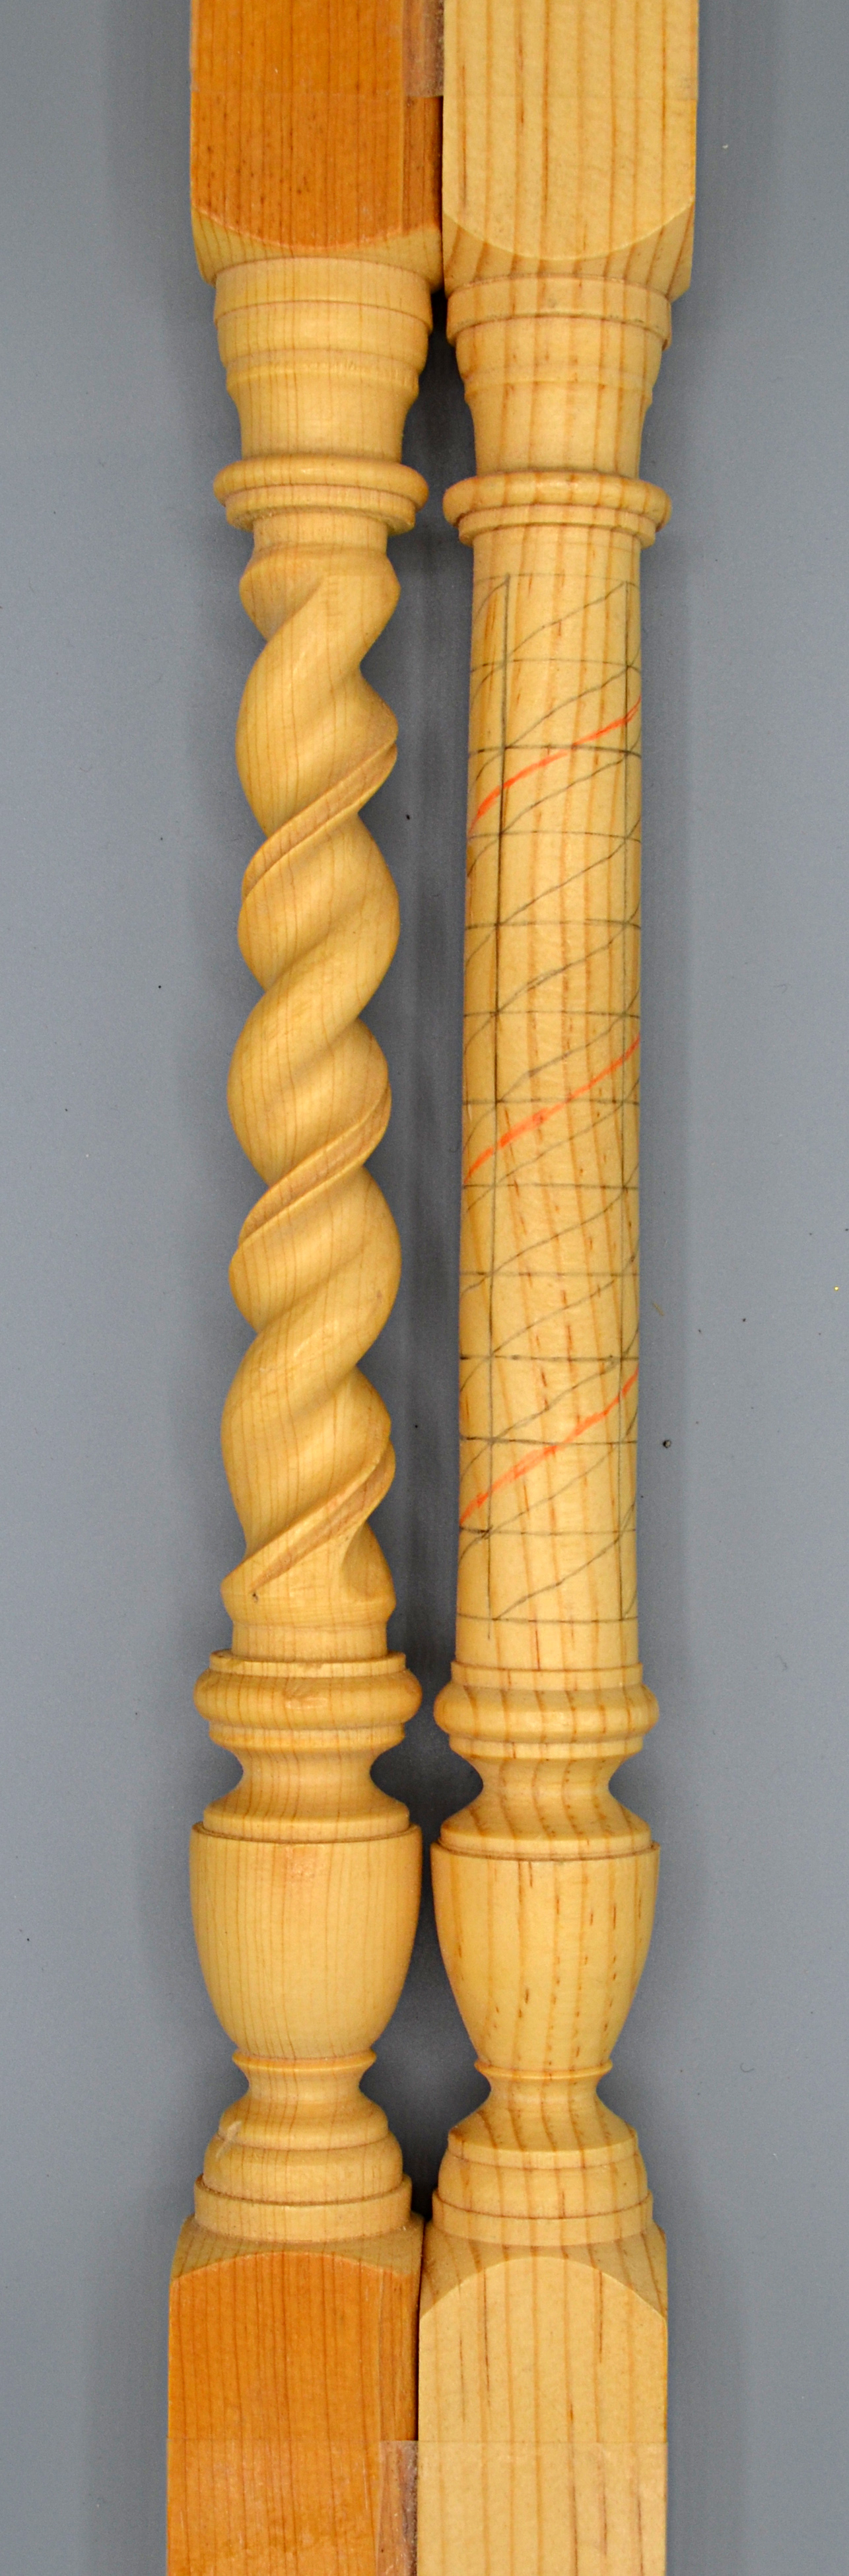
Photo: Double Point Twist
Yes – in some ways, this one is more obviously a 2-start than the single point twist.
The second start bead is very obviously divided right down the center, and then the coves come up to create the sharp edge. This careful division of the bead takes special care with the cutting tool to create a clean, sharp groove. This has the normal length of the segments.
You may have figured out by now exactly why we don’t often see these types of twistwork. There is significant ‘physicality’ to this type of embellishment, combined with the need for precision. It remains, however, a promising way to make a plain wood into something magical. You don’t need to start with a 20-baluster staircase – a simple candlestick will do it for that uninspiring piece of pine.
Dennis Liggett –January 2023


